Choosing the right Endcap Displays can change how shoppers notice, compare, and purchase products. A strong endcap turns unused aisle space into a focused selling opportunity. Yet appearance alone does not guarantee performance.
Retail behavior expert Paco Underhill is often credited with the principle, “Eye level is buy level.” His observation remains useful, but it is not a complete strategy. Product category, shopper traffic, packaging color, price, and store lighting also influence attention. A premium snack may need a clean, restrained presentation. A seasonal item may benefit from bold signage and stacked cartons. The best choice depends on the shopper and the selling environment.
This guide explores how to select Endcap Displays that fit your store, product size, and merchandising goals. It considers durability, visibility, accessibility, assembly time, and replenishment needs. These details matter during busy trading hours. They also affect staff workload.
Start with the aisle.
Measure the available width and height. Check whether shopping carts can pass comfortably. Observe where customers pause, turn, or reach. A display placed near a decision point may outperform one in a visually attractive location.
Testing is essential. Track unit sales, conversion rates, and stock replacement time before and after installation. The first layout may fail. That is normal. A crowded display can look energetic but create confusion. A minimal display can appear elegant but lack urgency.
Reliable merchandising requires evidence, not guesswork. By combining store observations, product data, and practical testing, retailers can choose Endcap Displays that support clearer shopping decisions and more consistent sales performance.
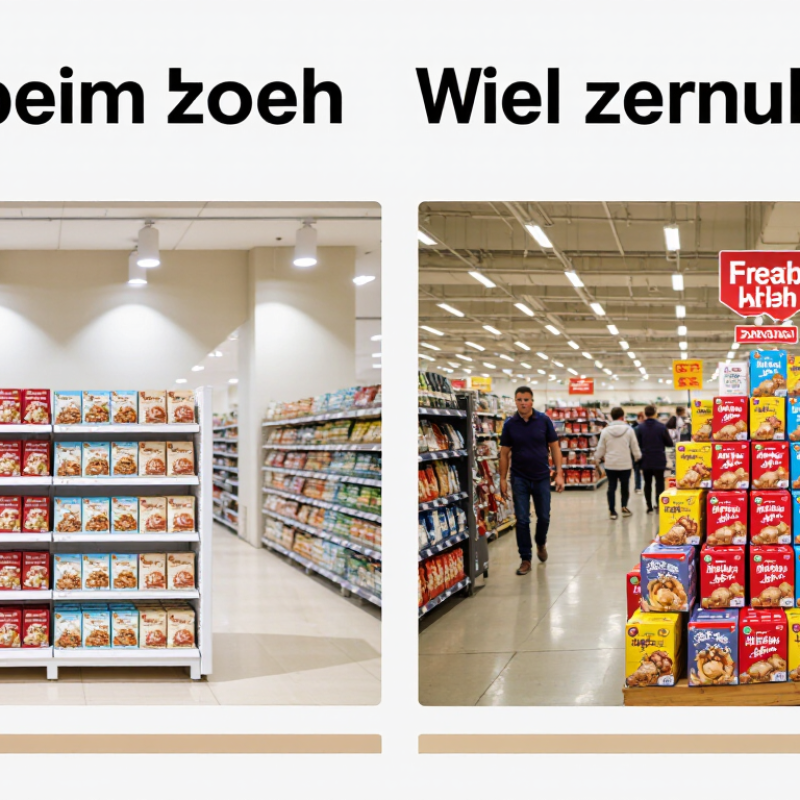
Define Your Store’s Goals and Endcap Display Requirements
Before choosing an endcap display, define what your store needs it to achieve. A display may promote seasonal products, increase basket size, or clear slow-moving inventory. One display cannot serve every purpose well. Write one primary goal and two supporting goals before selecting its size or design.
Study the shopping path around the proposed location. Measure aisle width, shopper visibility, lighting, and nearby product categories. A busy entrance may suit high-margin essentials, while a quieter aisle may support discovery items. Set measurable targets, such as a 15% sales increase or faster stock turnover. Keep the target realistic. An attractive display does not guarantee strong results.
Your product requirements should guide the structure. Heavy packages need stable shelves and easy restocking access. Small items may need dividers to prevent messy presentation. Consider price signs, safety clearance, inventory capacity, and staff movement. Test the display at a normal shopping distance, not only from the planning desk. It may look balanced on paper but appear crowded in the store. Leave enough space for customers to stop without blocking traffic. Review performance weekly through sales data, staff observations, and customer questions. If shoppers ignore the display, reconsider the message, location, or product mix rather than blaming the fixture alone.
How to Choose the Best Endcap Displays for Your Store?
Define your store’s goals and endcap display requirements before selecting a fixture. Prioritize the capabilities that most directly support your merchandising strategy.
The chart uses a practical planning scale from 1 to 5, where 1 means low priority and 5 means critical. High scores indicate requirements that should strongly influence the display’s design, placement, capacity, and replenishment process.
Measure Available Space and Analyze Customer Traffic Patterns
How to Choose the Best Endcap Displays for Your Store?
Measure the available space before choosing an endcap display. Record the wall height, aisle width, shelf depth, and nearby fixture positions. Leave enough room for carts and comfortable customer movement. A display that looks attractive on paper may create a narrow, frustrating path in practice. In store-planning projects, I measure at different times because crowded aisles can change throughout the day. Do not trust one measurement.
Customer traffic patterns should guide the display’s position and size. Watch where shoppers slow down, turn, compare products, or reach for nearby shelves. A simple observation chart can reveal busy periods and overlooked corners. Place high-interest products where natural movement supports visibility. However, heavy traffic is not always ideal. A display near a sharp turn may receive attention but cause congestion. I once favored a highly visible location and underestimated stopping space. That decision needed correction.
Tips: Measure twice. Use masking tape to mark the display footprint. Observe traffic for several time periods. Keep popular items within easy reach. Test a temporary setup before ordering permanent fixtures. Review the results after one week, and question assumptions that seem obvious.
Compare Display Materials, Structures, and Product Capacity
Choosing the best endcap starts with the product, not the fixture. POPAI’s 2014 Mass Merchant Shopper Engagement Study reported that 82% of purchase decisions occur in stores. Visibility therefore deserves serious attention.
Materials create different selling conditions. Corrugated board is lightweight, economical, and suitable for short campaigns. Wire offers ventilation and adjustable hooks for packaged goods. MDF feels stable but adds weight and assembly time. Acrylic delivers clarity, although scratches can weaken its appearance. Metal supports heavier products and repeated use. Nothing is perfect.
Structure controls visibility, access, and replenishment. Tiered shelves suit products needing comparison, while pegboard supports varied packaging sizes. Dump bins create volume, but they can look untidy quickly. Calculate capacity using facings, shelf depth, and units per facing. Then reduce the result slightly for realistic refilling. Maximum capacity is not useful capacity. A crowded display can hide the product.
NielsenIQ’s 2023 Sustainability in Retail Report found that 78% of consumers consider sustainability important. Reusable metal or recyclable board may therefore support both operations and shopper expectations. Test each option with actual packaging, not empty samples. Check reach height, stability, cleaning effort, and restocking time. I have seen attractive displays fail because staff could not refill them efficiently. Capture sales per facing and replenishment minutes during a pilot. Reflect on the result. The first design is rarely the smartest one.
Evaluate Visibility, Accessibility, Branding, and Safety
How to Choose the Best Endcap Displays for Your Store?
A strong endcap starts with visibility. During store audits, I watch how shoppers move, not just how the display looks. Place key products near natural sightlines, usually at eye or chest level. Bright lighting helps, but glare can hide labels. Test the display from the aisle entrance. Walk past it with a full cart. If customers must stop suddenly, the placement needs adjustment. Keep signs brief, readable, and consistent with the store’s visual identity. A crowded message weakens the brand.
Accessibility deserves equal attention. Shelves should allow comfortable reach without stretching or bending dangerously. Leave enough aisle space for carts, mobility devices, and two-way traffic. Try reaching the lowest and highest products yourself. This simple test often reveals poor planning. Product labels should face forward and remain visible after several items are removed. Staff need clear access for replenishment, too. Otherwise, the display may look attractive but perform poorly during busy hours.
Safety must guide every design decision. Check weight limits, base stability, sharp corners, and possible tipping points. Secure tall structures and keep emergency routes, sprinklers, and equipment unobstructed. Follow applicable building, fire, and accessibility requirements, then record routine inspections. I once approved a compact display that fit the aisle beautifully, but its narrow base shifted during restocking. That mistake changed my process. Now I test stability with realistic product weight and repeated handling. I still question whether every display earns its floor space. Sales data, staff feedback, and shopper behavior should keep challenging the original choice.
Plan Placement, Stocking, Testing, and Performance Tracking
An endcap earns attention only when placement, stock, and measurement work together. In my store audits, the strongest displays sat near natural traffic turns, not automatically at aisle entrances. Place complementary items where shoppers already pause. Keep the message visible from three steps away. Test one variable at a time.
POPAI’s Mass Merchant Shopper Engagement Study reported that 82% of purchase decisions occur in-store. That figure makes placement practical, not decorative. However, the study is older, so treat it as direction rather than current truth. Modern traffic patterns can differ sharply.
Stock by hourly demand, not by weekly average. Review sales by hour, day, and promotion period. Leave enough product for a full visual block, while keeping labels easy to read. A half-empty shelf signals poor control. An overfilled one hides the offer. Nielsen’s Global New Product Innovation Report found that 63% of respondents preferred new products from familiar brands. Use clear product benefits and simple comparisons when introducing unfamiliar items. Do not assume a bold sign fixes weak relevance. It often does not. Track units per store, conversion, margin, replenishment time, and missed-sales events. Compare the endcap with a similar aisle location. Use a two-week baseline, then test price, height, lighting, or copy. Record weather and local events. They can distort results. My own recurring mistake was changing several elements together. The lift looked impressive, but the cause stayed unclear. Reliable testing needs restraint, clean notes, and enough repetitions. A display can look excellent and still underperform. That is useful evidence.
FAQS
Choose one primary goal, such as promoting seasonal products or clearing slow-moving stock. Add two supporting goals. One display cannot perform every job equally well.
Study aisle width, lighting, shopper visibility, and nearby product categories. A busy entrance may suit high-margin essentials. A quieter aisle may encourage product discovery.
Set a measurable target, such as a 15% sales increase or faster stock turnover. Keep expectations realistic. Attractive design alone does not guarantee results.
Heavy packages need stable shelves and easy restocking access. Small products may need dividers. Check price signs, safety clearance, and staff movement before installation.
Corrugated board is light and economical for short campaigns. Wire supports ventilation and adjustable hooks. Metal handles heavier products and repeated use. Every material has trade-offs.
Calculate facings, shelf depth, and units per facing. Reduce the maximum capacity slightly for realistic refilling. A crowded display can hide the product.
Use actual packaging, not empty samples. Test stability, reach height, cleaning effort, and replenishment time. The first design may be wrong.
Review sales data, staff observations, and customer questions weekly. Track sales per facing and replenishment minutes during a pilot. If shoppers ignore it, reconsider the message, location, or product mix.
Conclusion
Choosing the right Endcap Displays begins with defining your store’s goals, such as increasing sales, promoting seasonal products, improving product discovery, or supporting a specific shopping journey. Before selecting a display, measure the available floor space and observe customer traffic patterns to identify high-visibility locations without obstructing movement. Consider materials, structural stability, product capacity, and ease of assembly so the display can support your merchandise while fitting the store’s overall layout.
Effective Endcap Displays should make products easy to see, reach, understand, and purchase. Include clear branding, organized product presentation, safe edges, and sufficient stability for everyday customer interaction. After installation, create a stocking plan that keeps products available and the display visually appealing. Test different placements, product arrangements, and promotional messages, then track sales, customer engagement, stock turnover, and maintenance needs. Use these results to refine the display strategy and improve performance over time.

 DirectRack